Sunday, October 21, 2012

Weekend Update: Painted


Finished the undercoat, patched a few spots, and laid down the road. Now, another round of sanding before another basecoat on the newly patched areas! The road will be a more sandy color of brown than the undercoat, and will get its own ground cover.

Sunday, October 14, 2012

Weekend Update - Plastered


Quite a big update from the last post: I've added a layer of patching compound to the hills, and primed the baseboard. The plaster layer went on fairly easily, I just massaged it into the cloth. I did have to cover the track with masking tape before I started though.

Note to future self: prime the boards before cutting them, and then do touch-ups later!

Next comes some small patches around the bases of bridges, and putting a coat of brown base paint (which as you can see I've tested on the small hill) over everything.

Saturday, October 6, 2012

Plaster Test

Tried out some patching plaster on the small hill, and it seems to have worked very well. The texture is nice and rough and it went on very easily. I mixed it a little wetter than the package instructions and smoothed it out using a latex gloved hand.

Wednesday, October 3, 2012

Tunnelling through the Hills

There's just no easy way to conceal an access panel on the top of a layout. You have to disguise a rectangular panel with a natural-looking landscape, and I just couldn't figure out out to do it convincingly. So out comes the drill and the saw, and there's a hole behind the tunnel and in the side wall for access. I put plaster cloth over it all, and I think it looks much better than trying to have access from the top.


I didn't leave much room to the side of the curve that runs alongside this hill; I'll have to be very careful when surfacing it not to run out of side clearance.


Here's a shot of the entire layout. All the hills are covered in plaster cloth, next comes spreading a thin layer of material to seal it, fill in gaps here and there, and give it the right texture.

Tuesday, September 25, 2012

The Hills are Alive with the Sound of Plaster Cloth


Started plastering the hills; plaster cloth is an amazing material and perfectly suited to this task. I finished these two small hills in much less time than I had thought it would take. Building the frame took much longer. Still building the frame around the tunnel in the far corner.

Tuesday, September 18, 2012

Framing the Landscape

Continuing work on the landscape and on the rural station building.

I added a hardboard face to the entire right edge of the layout, since that one is very visible from the room. In the corner is rises up to support the hill that will eventually go here. In hindsight I did not leave enough room for the signal box you can see here; the 'hills' behind it are essentially going to be cliff faces.

Built up a facing for the hill in the back left corner, where the tunnel will go. The top of this will lift off for access to the tunnel. I'm planning a sort of rolling hill ridge between this hill and the edge of the upper level siding you can see at the extreme right of this picture. My plaster cloth should arrive in about a week so I need to finish framing out the supports.


Finally, I'm slowly getting the base coat for Kabayama Station 樺山駅 done. Not quite sure what to do with the walls in the waiting area. There is no detail, and there's actually some large injection-mold studs around the windows that do not look realistic at all.

Sunday, September 9, 2012

Weekend Update: There's Hills in them there Hills!

I have not had much time to work on the layout recently, but I have done a few things here and there:

Making a freight platform from layered pieces of hardboard. The plastic piece in front is a Peco (I think) platform front, useful for the fine brickwork detail. The plan is to build up the bulk of the platform and then plaster the top, painting it to look like concrete.


Small rolling hill built up from two layers of cardboard. I'll lay the plaster cloth on top and add a few shrubs and maybe a couple trees. The main road will be sandwiched between this hill and the slope of the ramp.


Decorated the bridge! Printed these out on regular paper and glued on with PVA glue. I hope when the bridge is weathered they will look more like painted signboards and less like what they are.

Today I continued work on building up the landscape.

The tunnel portals are not painted yet, but I've put them in place using blu-tack temporarily to build up the tunnel. The plan is to have the top of the hill lift off for access, which I think is better than building a hole into the back of the hill since this is in the corner of the room. Sanding block is to keep the sides square while they dry. Unfortunately there will be a very steep hill between the ramp track and the top of the tunnel, but it's a good place to put a short cliff face or similar.


View of the upper tunnel portal with sides also temporarily attached.

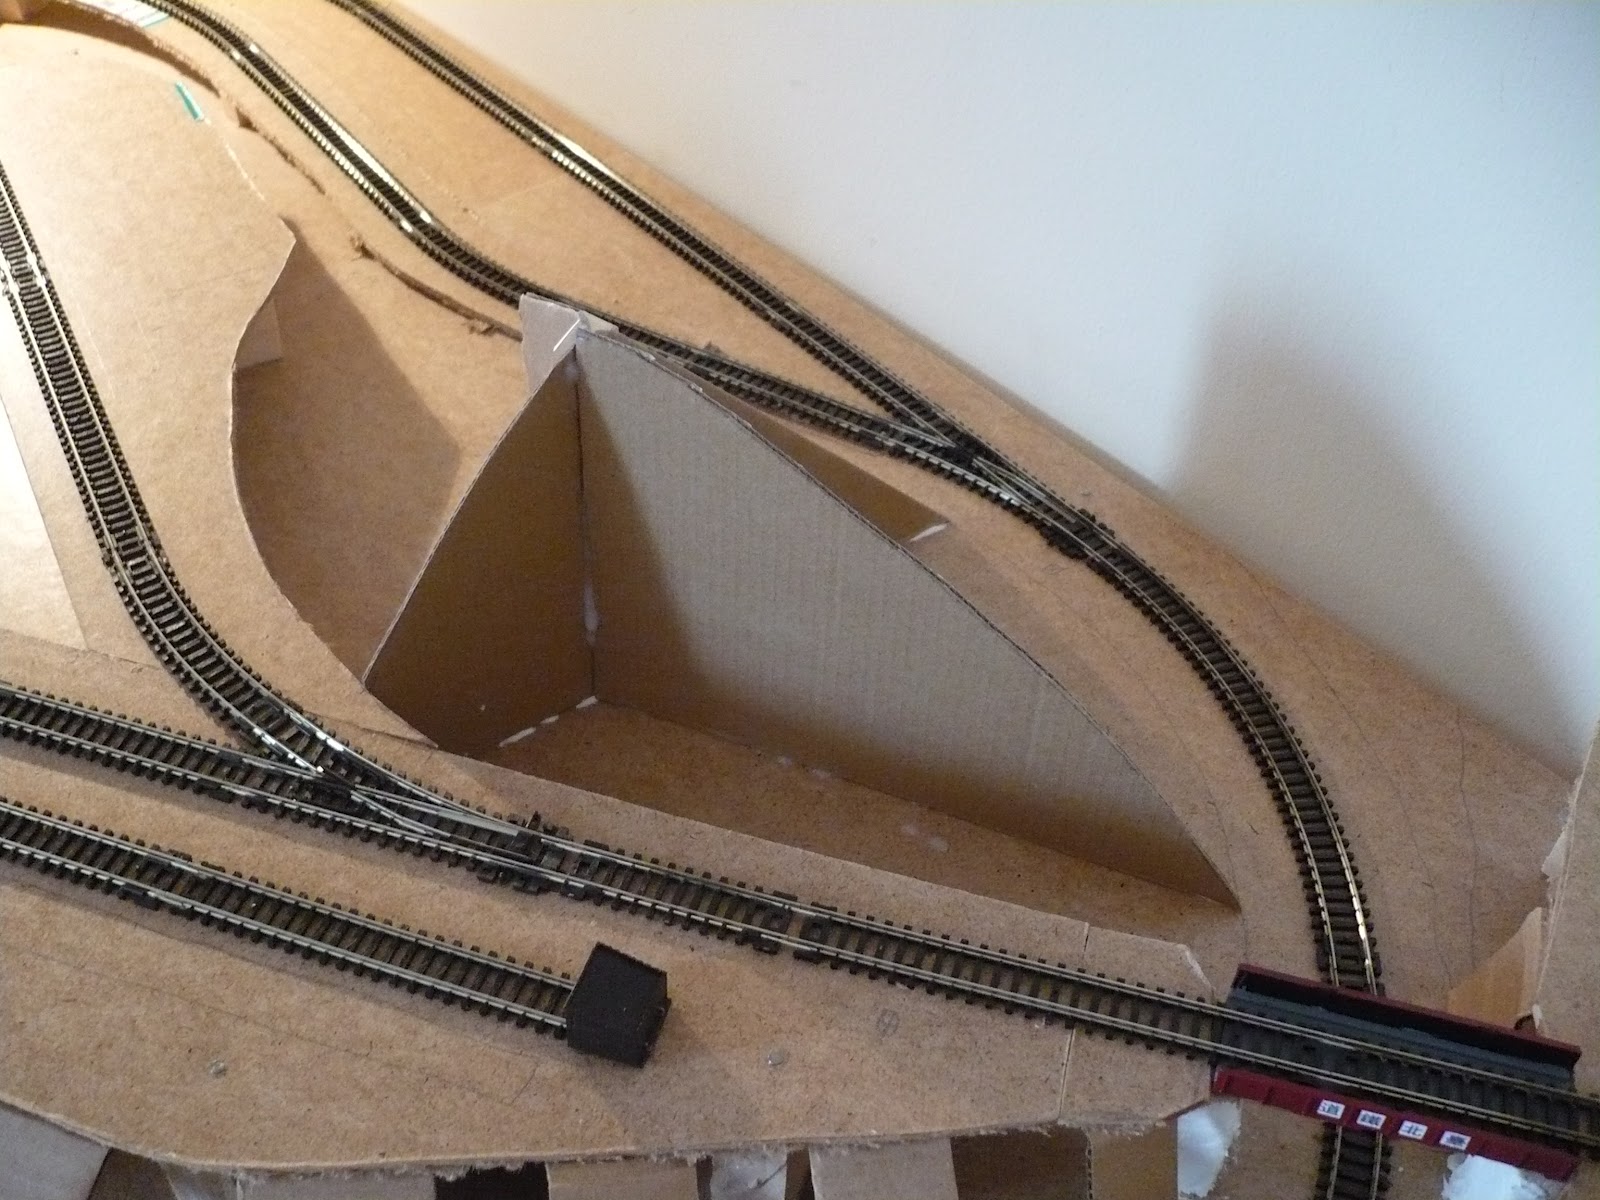
Trying a new technique for the large hill in the upper right of the layout. Started with a single piece of cardboard that I stuck in the middle, then eyeballed it so that an operator standing in front of the layout (assuming they're 6' tall) would just be able to see trains passing behind the hill, but would easily be able to lean over and see everything. Then I measured and cut out the cardboard shapes based on this height.


Another view of the hill framework.

Yet another view. I don't know whether I'll use cardboard strips, newspaper, or a combination of both to build up the hills in preparation for plastering.

Next is to continue with the tunnel hill, and finish off that platform. I've started figuring out what each of the five sidings will accept/produce, looking forward to starting a random waybill system for ordering different cars around the layout. Also named the small passenger station and putative town beyond: Kabayama 樺山, after a neighbourhood in the real Taihoku where a major freight yard was built ca. 1938.