Thursday, December 20, 2018

Ground Cover Mostly Done

I haven't posted in a while but I have been making steady progress on the layout. The basic ground cover is done and looking pretty good.

I had a mishap a few weeks ago when I tried to ballast part of the track. The ballast I used was a nice light grey collour when dry, but after the glue hit it, it turned coal-black and stayed like that after drying. Unfortunately I didn't do a test area and had already done a huge area of track. I scraped off as much as I could with a wire brush, and although it's not completely gone it doesn't look that bad, especially after the ties have been painted.

The road and village areas need some touch-ups and most of the track still needs to be painting, but I think it's coming along quite well.


Saturday, November 10, 2018

Base Coat of Earth Undertone

I've put down a light layer of plaster overtop the cloth, and added a base coat of earth tone. It's not as shiny as it appears in the image.


Saturday, October 27, 2018

Plaster Cloth Complete

I've finally finished adding the last layers of plaster cloth to build up the terrain. Next step is to add cast rock and a plaster layer to the cloth.


Sunday, October 14, 2018

Buildings

Placing buildings now, and building up road network

Sunday, October 7, 2018

Quick Update

The plaster cloth for the hills is complete, now I'm building up flat areas for buildings and will add in raised paths for roads and streets. Building the table with foldable legs really helped when the time came to rotate the layout to get at the far side.


Sunday, September 16, 2018

Update

Not too much more to show at the moment. I've been adding cardboard supports for the hills that I will eventually be creating using plaster cloth. I added another small platform in the middle of the layout that will provide the base for a pagoda building, but it's not going to hold any track on it.

Our cat has certainly found a comfortable spot in spite of the layout getting more and more crowded.


Wednesday, September 5, 2018

Track Complete!

With the addition of a small raised level in the corner of the layout, Taihoku 1937 is now track complete. Adding the supports to the wooden bridge went well, and it seems level, stable, and strong.


The rest of the upper level seems to have been fixed to the base surface quite well. No issues with movement yet.


I even started cutting out the planned pond, removing one layer of the hollow core door. Our cat also got involved in the photoshoot.


Next step is to connect all the feeder wires together into a single plug for the controller, then to start planning the terrain.


Saturday, September 1, 2018

Upper Level

I had a wooden bridge left over from the last iteration of the layout, and I wanted to use it again, but unitrack is sold with a molded plastic ballast already attached, which would not make sense for a wooden bridge. So I built my own: I removed two rails from a spare piece of straight Unitrack, used two short pieces on each end to make sure the gauge was right, and glued it to the top of the wooden bridge as so:


I wasn't sure it would work, but it ended up bring exactly in gauge and seemingly strong enough so that the rails won't become detached from the bridge.

I built an MDF base for the raised level of the layout, cutting it to fit the sections of track that are planned for that level. I only had A4-sized sheets of MDF to work with, so each piece was connected to its neighbour with a small overlapping tab glued to the underside of the base. Once the base was dry, I drilled holes for the one feeder track and two turnouts, and then nailed the track to the base to give it extra stability and so I was certain where the end that had to connect to the bridge would end up.

I used the same basic technique to raise it up as I had used on the ramp: balsa wood dowels cut to size (6 cm in this case) and placed around the base to support it. Below is a picture of the raise base before the columns were glued to the baseboard surface.


I've since attached the entire upper level to the baseboard, after placing the bridge piece in place to connect the ramp and the uppoer level. Next I'll need to cut and glue balsa supports for the bottom of the wooden bridge, since it's only suspended by the rail connectors for the moment.

Wednesday, August 29, 2018

Progress Update

As I mentioned in my last post, after a pause of nearly five years, I am finally re-starting the Taihoku 1937 project.

I started with an adaptation of my original layout designed for Kato Unitrack (I ended up re-designing the upper level a little bit).

This layout would retain the loop and crossover of the original but added a little more detail including a section of double track. The total size was close to 6 x 3 feet, which was perfect for my planned baseboard, a hollow-core door.

I knew that I wanted to be able to move the layout out of the way since the room that it's in is not that big, so I bought a pair of folding table legs and laid them out on the door as pictured.


I quickly realized that the door, which is only two thin sheets of (MDF?), would not support the screws for the legs, so I bought and had cut some plywood and used them as a base for the legs. The plywood was attached in place with wood glue and the screws were just long enough to go right through and bite into the surface of the door. It turned out to be strong, light, and portable which was perfect.


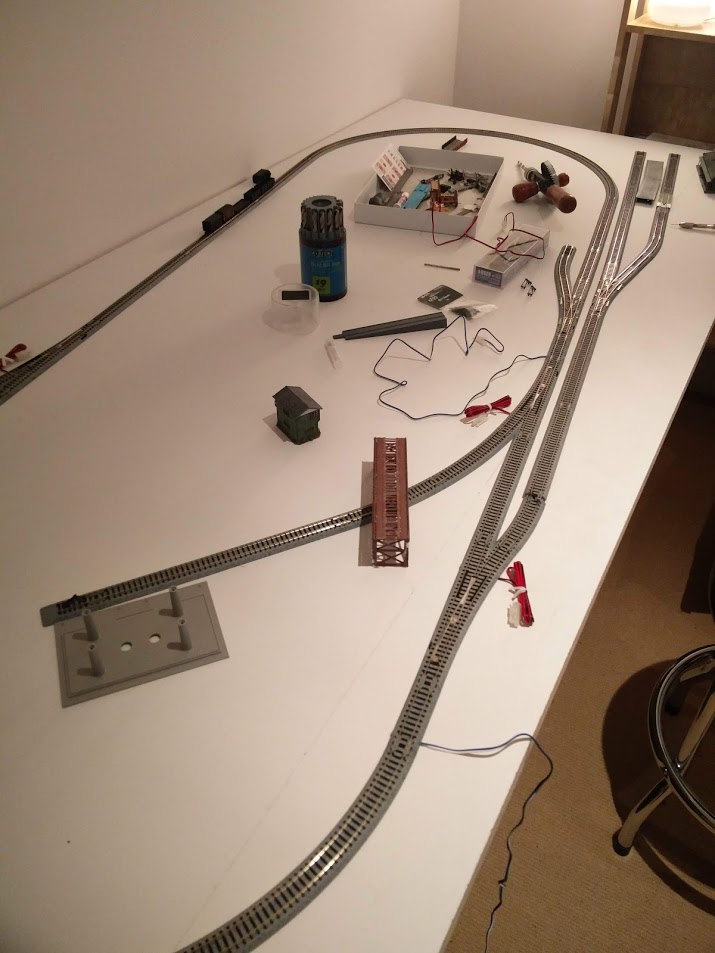
Once I had the table ready I laid out my track. The base level was easy and quick to set up - I just had to drill out the holes in each piece of track, drill holes for the power and switch wires to pass through, then nail the track into the surface of the table. The material of the hollow core door is perfect for grabbing the nails with enough force to keep the track in place.


I started with the yard area and laid out the track mostly by eye, trying making sure that all the connections were as square as possible, although Unitrack has quite a bit of flexibility in its connections which is nice. I also tested each connection as I went, and also ran a locomotive around to make sure there were no problematic connections. The following image is quite blurry but you can see the finished ramp up to the upper level, which I built from thin MDF and supported by balsa cylinders cut to size.


Next step is to build the MDF base for the upper level and build a custom piece of track for the wooden bridge.


Tuesday, August 14, 2018

Rebirth

After several years not being able to have a layout in my home, I finally have enough space to restart the Taihoku Railroad. I have a place, a baseboard, and a collection of Kato Unitrack ready, more updates to come shortly.